Tuesday, March 27, 2012

Our One Year Anniversary

Sunday Tim and I celebrated our one year wedding anniversary. Hard to believe how fast the year went by!
Since Tim had class in Orlando most of the weekend, we had a pretty low key anniversary.

We started the day off with breakfast ...( or as Tim would say a "Meaty Breakfast").
Southwestern potatoes, bacon and ham and veggie eggs. 
We went to the gym together then Tim went fishing while I tried to get caught up on some work stuff. Since not all of us are on Spring Break this week, I wanted to go to an early dinner as I had to be to work early on Monday. We chose to go to Island Way, one of my favorites. If you are not familiar, they have an AWESOME early bird from 4-5:30. You get 2 soft drinks, 2 entrees, either a salad or soup and dessert for $25. They also have great drink prices and their sushi is amazing. Regardless of the price, the atmosphere is by far the best piece!

We then came home to enjoy our wedding cake!


And my favorite...champagne in the toasting flutes from our wedding.


The cake was slightly drier but surprisingly delicious!

....so much so that Tim has eaten it every night since!

Tim also got me this sweet "Key to my heart" Pandora charm.

I went the more traditional route and stuck with the first anniversary paper theme. I ordered a print to hang in our master bedroom from this Etsy seller. She customized it to my color scheme and both Tim and I love it.
We have had an amazing first year together and I am so excited for what our future holds.

Wednesday, March 21, 2012

Monday, March 19, 2012

Product Review: Kraft Fresh Takes

I LOVE couponing. And fast dinners. These two facts lead to me to Kraft Fresh Takes. I had 4 Manufacturer Coupons for $1 off 1. My Publix also takes Target coupons so I was also able to use a Target coupon for $1.50 off/ 3 Kraft Products. This means I was able to pick up 4 of these Kraft Fresh Takes for a grand total of $2.46 or 61.5 cents a piece!

Last week, we had the Rosemary and Roasted Garlic (un-pictured) and it was delicious! My husband has a weird relationship with cheese so I didn't tell him what was on the chicken. After the first bite he said "This chicken is really good". Then I told him it was cheese and he was fine! Had I told him to begin with, he may not have tried it.

Tonight we had the Chili Lime and Panko (again I used chicken but you could also use fish or pork). I served it with roasted sesame soy-sauce asparagus and sliced fruit (mango and kiwi). I thought the chicken had a slight kick to it but wasn't too spicy. I still think the Rosemary and Roasted Garlic is my favorite so far!Although, I was thinking of using the remaining Chili Lime to cook fish in. It would make an AWESOME fish taco!

Since I only cook for  two (and am cheap), I only used half the breading/cheese mix. I also only use one chicken breast cut in half and it is more then enough for both of us! Anyway, as long as you don't mix the chicken in the bag ( don't let meat touch the unused portion!), you can use the remaining mixture for a second meal. If I factor that into the price we are down to 30 cents!

Here is tonight's meal:
Yes, this is one chicken breast cut in half! Honestly, who can eat a whole?

Sunday, March 18, 2012

A fabulous, low-key St. Paddy's Day

Growing up we always celebrated St. Patrick's Day, primarily because it was also my maternal grandfather's birthday. He and my grandmother were both Irish and would always have the family over to celebrate the day. My grandfather died in 2000, but it is crazy to think that yesterday would have been his 90th birthday!

So ever since I can remember we always had a traditional Irish meal for St. Patrick's Day... Corned beef, cabbage and Irish soda bread. Wanting to carry on the tradition, last night I made my first corned beef. My mom always made the corned beef by boiling it in a pot for several hours and then adding in the potatoes and the cabbage. While I have enjoyed corned beef this way for years, I wanted to try something different.

After searching around Google for inspiration, I decided that I was going to bake my corned beef. Let's just say I will NEVER boil corned beef. It was delicious! First, I rinsed the corned beef  and placed it fat side up on a piece of foil big enough to wrap it in. Then I smeared Hot & Sweet Mustard all over the top of the meat and sprinkled a handful of brown sugar over that. I wrapped it all in the foil to keep the juices in and then stuck it in the oven on 350. My corned beef was around 2.5 pounds and I cooked it about an hour and forty minutes.
Tim and I both love roasted cabbage wedges and will often have that as a side dish. So I made the cabbage that way. (Cut into 8 edges, seasoned with garlic, lemon and olive oil, roast at 450).  And I cooked the potatoes in the corned beef seasoning that came with the meat.
We skipped the Irish Soda Bread this year, but a wonderful meal nonetheless.
Oh, And I have to share this picture of the Harrigan clan in their St. Paddy's day collars!
Seriously, how cute are they?

Saturday, March 17, 2012

Adding Curb appeal

As I have mentioned before, the landscaping at our house was disastrous at the time of purchase. We have worked really hard over the past year to get things looking better and more "us". However, we have two small areas on either side of the garage that have sat untouched for a year.  Add that to the fact that we did not have gutters and we were left with this mess:
We have since paid someone to come and install gutters and repaired the area we had to cut out to fix our sprinkler system. Over the past two weekends, Tim and I finally got around to cleaning up this area. We purchased some retention wall bricks from Lowe's to enclose the areas.


I then laid down Weed Guard with some landscape pins in both of the areas. I am all about things looking nice but I HATE weeding. We have used this stuff everywhere and a year later, I have not had to weed! Tip: Sam's club often sells the HUGE role of weed guard this time of year. And it ends up being significantly cheaper then at Lowe's or Home Depot.

 In terms of landscaping, Tim and I had been talking about adding "circle trees" to these areas for quite some time. "Circle Trees", as we call them, are really called Eugenia Topiary. It was a bit of a splurge at $40 a plant. We also had a hard time locating two plants that were similar in size and shape. We wanted them to look somewhat symmetrical since they were going to be framing either side of our garage. We ended up finding two similar plants at Home Depot after striking out at two different Lowe's.


I think it s HUGE improvement. Here is the street view, please overlook the messy driveway!


Tuesday, March 13, 2012

Shed Project Phase 1

Ever since Tim and I moved into our house last March, we had plans of putting a shed in the backyard. I was only able to park my car in the garage for 1 week before we started collecting materials for the shed in our garage. My dad works for this local company called Structall so we used their panels to make the shed. My dad was really the brains behind this project. Fast forward 1 year later and we are almost done with the shed project!

Since we were collecting our materials from scraps, it took a while to gather the materials. We started constructing the actual shed the last weekend in January. Phase one was to build a frame out of plywood for the shed to sit on. Since Tim was at a training, my dad and I took off to Lowe's to purchase supplies and quickly put together this platform on my back patio.
The worst part was having to help him carry this across the backyard.


Then my job was to run weed guard along the edges as it would be near impossible to get any type of lawn equipment back there. Plus, we planned to just throw mulch down anyway.
 Luckily, Tim came home at this point and was able to take over. He and my dad spent 1/2 day Saturday and the majority of the day Sunday adding the walls and the roof. 


By the end of the weekend, we had a legitimate shed!
The next weekend was spent adding the door and a lock.
We my also add a window in the door at some point.
And my favorite part...a window!
That basically sums up phase one of the shed project. Tim and I completed Phase 2: Landscaping this past weekend. And of course since my husband and my father are involved Phase 3 is adding electricity to the shed..so that they can add a TV! I personally do not feel this is necessary but there is no reasoning with either of them when it comes to electronics. I choose my battles :)

Budget Breakdown for phase 1: $136. Not too bad!

Wednesday, March 7, 2012

Word Less Wednesday: Green Goddess

Less words today instead of wordless. I have been obsessed with roasted vegetables lately!

Last night we had roasted broccoli with garlic and lemon. Seriously, I could eat the whole pan myself!
 Tonight we had roasted Parmesan and garlic brussel sprouts. My mother-in-law was shocked when I told her Tim can devour some brussel sprouts. These are so good. I have been know to eat a JUST brussel spouts for dinner when the husband has a training after work.
 And while I am sharing my love for all things green....I made these super simple, yet delicious, Sour patch grapes! Simply roll washed grapes in jello powder. I used 1/2 pack of  Sugar Free lime and 1/2 pack of Sugar Free Strawberry.
Confession: these did not last very long :)

Tuesday, March 6, 2012

Homemade Laundry Soap

Two weeks without blogging? Yes. Our computer had some issues. But we have a new hard drive and Windows 7 thanks to a family friend.

As I mentioned here, I have been trying to use more natural products. Pinterest has been great for helping me explore different things I can make that are 1) more natural and 2) more cost effective. One of the switches I have been wanting to make is to homemade laundry soap. I typically use Tide Free and Clear or Method. Have you seen the price tag on either of these lately?  Around $7 for a small container. Well this weekend I noticed I am getting low on my last bottle of Method so I took the leap and made my first batch of homemade soap.
I had been collecting supplies over the last few weeks. I ordered a Laundry bar on my last Goat Milk Stuff order in anticipation for the soap making. I also picked up a cheese grater at the dollar store. I don't know about you but the idea of grating soap with the same grater I use for food sounds completely unappealing.


All the goods.
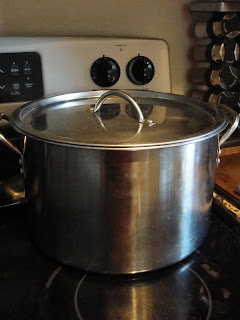
  I did not have a large enough pot so I borrowed one that could hold up to 2 gallons from my parent's house. I picked up a box of Borax and Washing Powder at Publix.
 After doing a lot of reach on various methods, I decided to stick with a liquid detergent. Even though many people use a power in their HE Front loaders, I was skeptical. I decided to only make 1/2 a batch which is one gallon of soap ( as a trial).
 I grated 1/2 of my laundry bar with the cheese grater and put it directly into the pot.
 I then added 1/2 gallon of water to the soap and brought this to a boil. Just so the soap dissolves.
 I then added 1/2 cup of Borax and 1/2 cup of washing powder to the pot and brought this back to boil.
 It will get rather foamy. It almost overflowed at one point.
 Once everything is boiling, I removed the pot from the heat. Things will settle down. Then I added the remaining 1/2 gallon of water. I let things cool then poured it back into the gallon bottle. THAT'S IT!
From the research I did, I saw that a lot of people has consistency issues. I think it depends on the type of and how much soap you use. My ratio seemed to work pretty well. I read that some people could not even pour theirs from the container. Mine is a little lumpy but with pours easily. There really isn't much smell to it but again this will depend on the soap you use. Or you can always add essential oils. I prefer to add this into fabric softener (hint hint upcoming DIY adventure).

So my thoughts? It was easier to make then I thought. The laundry came out just as clean as with commercial products.I used about 1/3 of a cup, just to the fill line on my HE machine. The husband was skeptical but I think he is learning not to doubt me :)

Cost? Well initial output is more. For my soap, powders and grater I spent around $12. Mind you I only used 1/2 cup out of each box so I  will get MANY more batches of homemade soap out of this. The cost will also depend on what soap you use as your base. The breakdowns I have seen ended up as low as 5 cents a load. I plan on keeping track so I can come up with my own breakdown of savings.
End of code