Monday, January 14, 2013

Simple Art Project

I was once again inspired by Pinterest to take on this simple art project. I have been looking for bathroom art for quite a while now and always seem to come up empty handed. I saw a pin from Two Girls Being Crafty and decided to give it a try. It was relatively inexpensive so if it didn't turn out it wouldn't be a huge loss!

My supplies consisted of a  12 x 16 canvas ( on sale for $4.99)

 Some acrylic craft paints ( 49- 99 cents each)
 And various size sponge dabbers ( 2.49 after 50% off coupon)
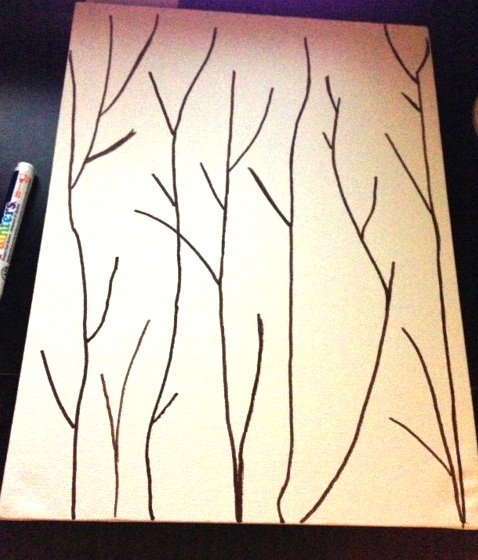
 First I used a brown acrylic paint pen to draw my branches. I decided to keep my canvas vertical because of the narrow wall space in our master bathroom.

Then I used the various dabbers to add the dots in the different colored paints. This is what it looked like after one coat. Good, but I had a lot of the white canvas showing through on some of the paint colors.  I decided to add another coat the following night.
This is what it looks like now, after the second coat of paint.
I am really pleased with the way it came out! Not bad for under $10, huh? Bathroom art accomplished.

Sunday, January 13, 2013

Outdoor Lighting

Back at the end of November, I alluded to a larger project that stemmed from prepping for our fence install. In removing all the existing lights in my "basketball court", I was really unsure if I wanted to replace them. So we went to Lowe's just to check out our options. We hit the outdoor lighting mother load! I guess due to it being winter, they were cleareancing out almost the whole section of outdoor lights. I had been thinking about switching out our existing white lights for something less ornate so this was perfect time. I think we bought one of every light on sale, brought them all home to test around the perimeter of the house. Mind you we have a TON of outdoor lights.

The whole house had the same white ornate lighting. Since we were unsure if we were going to like any of the lights we picked up, we initially started by holding the lights up next to the existing lights on either side of the garage door.
Option 1: I LOVED this oil rubbed bronze lantern light so much! Unfortunately, it felt too small for the front of the house.
Option 2: A square white light. Less ornate but still in the white scheme. It felt very beach- housey.
Option 3: Very similar to option #2 but in oil rubbed bronze.
I was quick to decide I wanted to go the oil rubbed bronze route. So the husband removed the existing white light to get a better idea of what things would look light. In doing so, we discovered that the previous owners did not even bother to install an electrical box, we simply had wires coming out of the stucco. This house never ceases to amaze me!
We then tried each oil rubbed bronze light one more time before committing:
I was hoping I would like the lantern because the price was AWESOME ( $17 each on clearance as opposed to $50/ each for the square light on the right).  But we choose the light on the right for either side of the garage door due to the size of the lantern just feeling "too small". I tried to make the lantern work at other sites around the perimeter of the house but it clearly was just not meant to be! I think its the green paint? My husband almost killed me during this project because I decided I would love to paint our house gray. I even went to the store and bought gray paint samples. He reminded me our house was JUST painted before we moved in. I am so glad I listened because that is a huge project that we don't really need to take on right now!

Anyway, here are the new garage lights.

While they do make matching "post" lights that we could have installed on the "basketball court", we decided to skip replacing the lights in that area altogether. We did however find clearance lights for three other areas around the house.

After removing the light by the front door ( and a huge wasps nest behind it), we tried several other lights in this area. Nothing felt right. We ultimately went with a small outdoor wall sconce. ( On sale for $7 at Lowes).

For the light on the back porch and the light on the side of the house (where we keep the trash and recycling), we went with a simple oil rubbed bronze lantern. We ended up getting these for $13/each on clearance at Lowes!

 Its been over a month now and we are really happy with everything. $133 plus tax for all new outdoor light fixtures sounds pretty good to me! Anyone else score any good bargains lately?


Sunday, December 30, 2012

Neighbor Gifts: Homemade Holiday Coasters

Every year we put together small gifts for our neighbors. While we live in a neighborhood with very friendly people, we only really know the 5 houses surrounding ours. Last year was our first Christmas in this house (Despite having owned it the previous Christmas, we weren't living here as we were still in reno mode). So, last Christmas I bought each of the neighbors a Holiday themed Chinese carton and filled it with hot homemade Christmas cookies. Tim and I then delivered them door-to-door with our Christmas card.

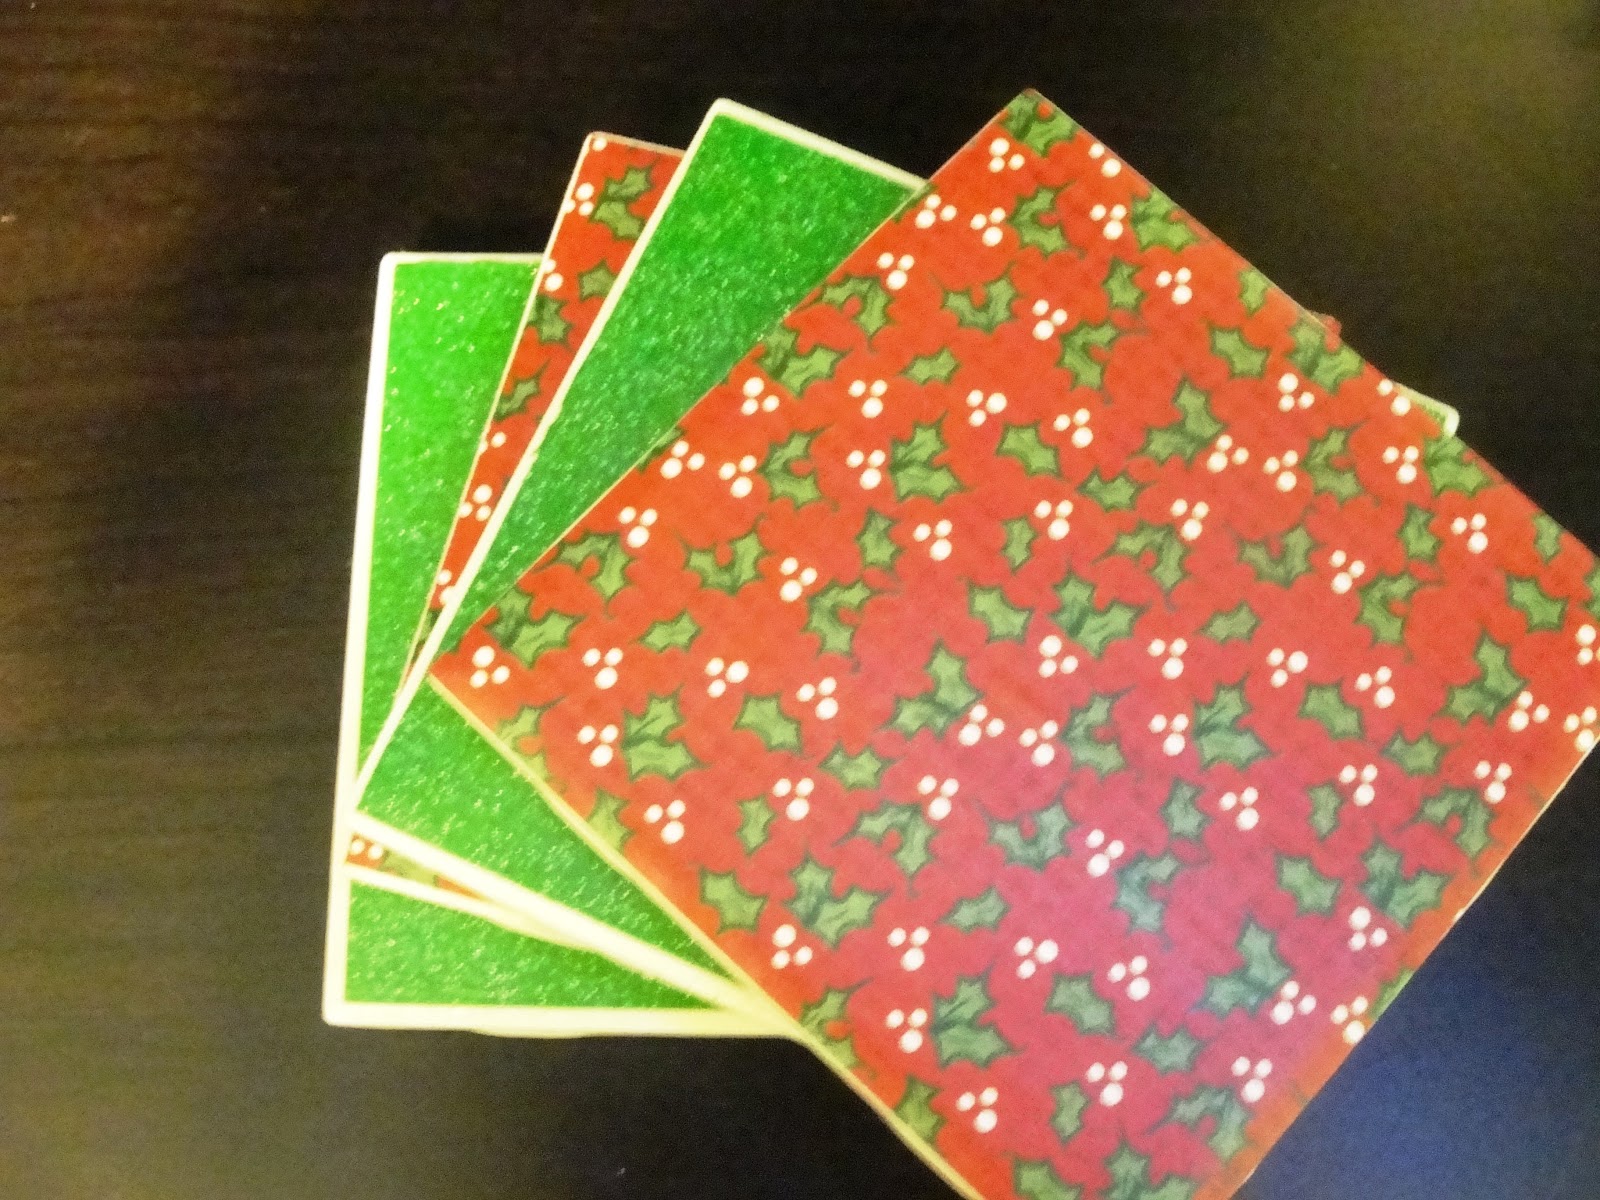
While I LOVED baking last year and had every intention to do so again this year, it didn't happen! While in Joann's one weekend, I remembered seeing a pin for DIY coasters made of napkins. I decided to make each of my 5 neighbors a set of 4 holiday coasters.

While there are MANY tutorials out there on the "how to" ( ie :Here ) , I thought I would share my tips and tricks as it definitely wasn't as straight forward as I thought.

Supplies:
20- basic white tiles, mine were 4.25 square and cost 15 cents each.  But you could also use larger and use as trivet.
Mod Podge
Foam brush
Spray acrylic
X-acto Knife
Cork ( or felt) for the backs
Paper of your choosing.
Optional: a cutting mat. I could not imagine doing this project without mine!

I tried several different papers for this project: card stock, napkins, and scrapbook paper. There is some GORGEOUS glittery card stock out there that is great for the holidays. DON'T DO IT! The card stock is too thick and will easily peel off the tile (especially if your tile is a smooth surface like mine). Napkins have a tendency to crinkle when you apply the mod podge. In my opinion, the best option is regular thin (not card stock) scrapbook paper. This will give you the smoothest finish.

The first thing I did to cut ALL my paper squares using the X-acto knife.
Next, I laid all my tiles outside on newspaper and applied a thin layer of Mod Podge.

I had almost a whole bottle of Mod Podge but I ended up picking up a new bottle made for paper since mine was for fabric. Apply a thin coat and rub out any bubbles to ensure everything is smooth.
Next, I applied an additional layer of Mod Podge on top of the paper. It doesn't need to be perfect as it will dry clear BUT try to make it as smooth and even as possible to avoid any "clumps" from drying.

 Let them dry fully before spraying with a layer of acrylic.
 After they cured for 24-hours outside, I went around all the edges with the X-acto and added a thin layer of cork on the back of the coasters. TIP: Buy the self-adhesive cork. Many people have trouble with JUST using the hot glue as the cork is only adhered where you apply the hot glue. Use self-adhesive cork and reinforce with a few dots of hot glue.

I used ribbon to tie them in sets of four...neighbor gifts DONE!


Wednesday, December 26, 2012

Christmas 2012

It's hard to believe another Christmas has passed and we are approaching the end of another year. It is so crazy to me how quickly the years are passing. December 20th marked two years since we purchased our home..two years? Feels like two months!

Things have been very busy around here as we prepped for the holidays. Right before Christmas, I got a promotion to Director at work. This means I will be running three programs instead of one. It was very unexpected but I am very excited to start this new challenge! And it definitely started the Holidays out on a great foot!

Regardless of how the holiday falls, I always take Christmas Eve off. I very rarely take time off but I just don't feel right working that day. This year we got a little visitor on Christmas Eve:


Meet Milo. He belongs to my friend, Lee Ann, but is staying with us through the Holidays. Much of Christmas Eve day was spent prepping food for our big Christmas Dinner. Every year for Christmas Eve, we go to the Olive Garden for dinner with my in laws before heading to their church for a 9pm service. This year was much of the same:


Christmas morning, Tim and I head over to my parent's house in our jammies for breakfast and presents. We then go home to get ready as we host dinner. His parent's then come over about an hour before my parents so that we can exchange gifts. We both have relatively small families so it just works out best this way. This year's meal was prime rib, roasted brussel sprouts, mac and cheese, salad and rolls with fresh homemade cinnamon butter. Oh...and the dessert! I attempted to make my very first cheesecake. Only it wasn't just cheesecake, it was white chocolate peppermint bark cheesecake. Oh.my.word. It was delicious! Totally worth the extra work!


I had a really hard time coming up with things I wanted this year. Maybe that is a sign that I am getting old? To me the holidays are about giving ( I have always been more to enjoy giving more that receiving) and family. Oh, but I did get one thing that I really wanted:


Hope everyone had a fabulous holiday! Only three more working days till the next one! :)


Sunday, December 16, 2012

Oh the difference a light can make

The lighting in our master bedroom is BAD. When we moved in, the only light was from the fan. Since then we have added lamps to either side of the bed which gets used nightly.

Since our house was built in the 70's we also had a weirdly placed electrical box in the ceiling which was once the home to the infamous swag light.

We decided we could really use a light on the side of the room but didn't want the 1970's feel. I found an expensive light kit at Lowe's ( under $20) and a shade to match our existing lamps ( around $15). We decided we could just run the electric over to be centered above the chest of drawers without swagging anything.

The only glitch was that we had to hang the shade upside down so that the bulb was not visible underneath the lamp. I wasn't sure at first but it has grown on me.
Oh and I was waiting to hang the Harrigan Sign until after we installed this light so we could judge placement better. So I am happy to announce that it finally made it's way onto the wall!


As you can see, we left the old electrical box for now. We may change this in the future but it really doesn't bother us. Plus, you never know when we'll get all crazy and want a swagged light.

We still have several other lighting projects to address in this room, including adding a splitter to the fan light and adding light to the closet (ours is almost non existent). Funny aside: The lack of lighting in the closet cause the husband to wear two different shoes to work last week! :)

Monday, December 10, 2012

Christmas Decor

The weekend following Thanksgiving, we take the Christmas Decorations down from the attic and begin the process of decorating the house. Tim, as usual, has outdoor duty while I am responsible for indoor decorations. Well, Tim beat me this year! While I started decorating the house the weekend after Thanksgiving, I dragged it out a little more than usual!

I am happy to report that everything is now decorated. One of my favorite part's of Christmas is having the Christmas tree be the only source of light in a room. I love the ambiance.
I stuck with the Silver and Gold theme.

Aside from the tree, I hang our stockings from the bookshelves since we do not a fireplace in this house. I never got around to having the stockings embroidered last year and now I am not sure that I will. I saw this on Pinterest and thought it was a cute idea. So now I am on the hunt for some cute initial ornaments!
I keep the table pretty basic: silver and gold place mats along with a silver centerpiece. I LOVE the flame less candles!
The bowl on top of the wine rack gets filled with silver and gold ornaments.
I switch out the wreath on the front door and add something Christmasy to the planter. Last year it was spray painted pine cones, this year... more silver and gold ornaments!

This weekend we received our first two Christmas cards. So I turned to my friend Pinterest and searched for ways to display Christmas cards. I wanted something inexpensive (it is the Holiday season after all) and easy to make. I liked the idea of this and this. So I picked up a cheap sign (around $7 at Joann's) and attached some ribbon from my stash. Instant card holder.
LOVED that someone mailed me a dachshund Christmas card! 
Oh and my other favorite part of Christmas: The outside of the house! We have some reindeer in the front yard but it is too hard to get them all in one shot!
Having a festive house definitely helps you get into the Christmas spirit! I am about 85% done shopping and hope to finish up this weekend! Now if only we would get some cooler weather...

Oh and the dogs are also "decorated"!


Wednesday, December 5, 2012

Fence Install

Last Thursday the new fence was installed. I worked from home so that I could keep an eye on things and make sure I liked it. Two installers from Westcoast Fence showed up around 10am. Since all the fence removal and prep work was done, they were able to get right to work installing the vinyl fencing.

The dogs drove me crazy barking all day. I ended up putting them in the master bedroom where they could not see the installers at all! When they left for lunch, I snuck outside and snapped two pictures of the progress.
View from my neighbors driveway. 

Front view after halfway through the install 
I really liked how everything was coming along. They returned around 2pm as they were short one panel and had to make a trip back to the main office. They left shortly after 4pm, leaving me with this:
View from my driveway

View from my street. 

At first I was very unsure about the gate. In my head I just assumed it would not be that tall. However, once I started thinking about it, I realized why they did it and how silly it would look if it was shorter. It has been almost a week and it is starting to grow on me. I like the extra privacy and I like being able to let the dogs run around out there.

So this completes the fencing stage of this project. Next step: deciding what to do with the floor!

Oh, and here is the before and after.


End of code