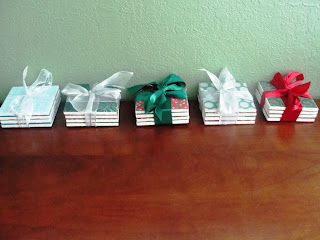
While I LOVED baking last year and had every intention to do so again this year, it didn't happen! While in Joann's one weekend, I remembered seeing a pin for DIY coasters made of napkins. I decided to make each of my 5 neighbors a set of 4 holiday coasters.
While there are MANY tutorials out there on the "how to" ( ie :Here ) , I thought I would share my tips and tricks as it definitely wasn't as straight forward as I thought.
Supplies:
20- basic white tiles, mine were 4.25 square and cost 15 cents each. But you could also use larger and use as trivet.
Mod Podge
Foam brush
Spray acrylic
X-acto Knife
Cork ( or felt) for the backs
Paper of your choosing.
Optional: a cutting mat. I could not imagine doing this project without mine!
I tried several different papers for this project: card stock, napkins, and scrapbook paper. There is some GORGEOUS glittery card stock out there that is great for the holidays. DON'T DO IT! The card stock is too thick and will easily peel off the tile (especially if your tile is a smooth surface like mine). Napkins have a tendency to crinkle when you apply the mod podge. In my opinion, the best option is regular thin (not card stock) scrapbook paper. This will give you the smoothest finish.
The first thing I did to cut ALL my paper squares using the X-acto knife.
Next, I laid all my tiles outside on newspaper and applied a thin layer of Mod Podge.
Next, I applied an additional layer of Mod Podge on top of the paper. It doesn't need to be perfect as it will dry clear BUT try to make it as smooth and even as possible to avoid any "clumps" from drying.
Let them dry fully before spraying with a layer of acrylic.
After they cured for 24-hours outside, I went around all the edges with the X-acto and added a thin layer of cork on the back of the coasters. TIP: Buy the self-adhesive cork. Many people have trouble with JUST using the hot glue as the cork is only adhered where you apply the hot glue. Use self-adhesive cork and reinforce with a few dots of hot glue.
I used ribbon to tie them in sets of four...neighbor gifts DONE!


No comments:
Post a Comment