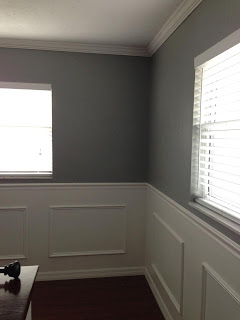
I ended up buying a contractor's pack of moulding from Lowe's. All the other Crown in our house we purchased at Home Depot and was traditional one sided crown. This was flip face moulding. So after painting we were sure to mark the "bad" side with a sharpie to insure there were no mess ups during installation.
Tim and my Dad started the day by installing the crown moulding on their matching camouflage ladders. We weren't 100% sure on how the flip faced moulding would lay... turns out it is exactly the same as the one-sided. The only thing a bit tricky were the cuts. We have a templates that my dad made 2.5 years ago when we first installed Crown. We refer to the four templates as RIC, LIC, ROC, and LOC: Right interior corner, left interior corner, right outer corner, and left outer corner. They haven't failed us yet!
When installing Crown in an older home, you often end up with corners like this... but trust me, it is invisible in the end!
After everything was pinned down, Tim and my dad went around and caulked everything with White Lightening Caulk, using a damp sponge to rid of an any excess caulk on the fresh paint. They also caulked several areas on the paneling that needed some touch ups as well.
Once everything was installed and caulked, I come around for paint touch ups: I went over every corner and pin hole in the crown and paneling. I also decided to roll another thin layer of paint over the paneling, now that it was in place and settled.
Everything is looking nice and crisp...
So much so that we decided to go ahead and move in the furniture once everything was dry.
And since there is no baby yet... we used our current "baby" as a place holder.
Its feels so good to make this much progress on the room. Now on to the fun stuff.... Accessorizing! :)


No comments:
Post a Comment