Showing posts with label Recipes. Show all posts

Sunday, November 18, 2012

Roasted Tomato & Kale Pasta

Fun fact: I HATE tomatoes. Roast them and I LOVE them. I think it is a texture thing. Anyway, this is one of my favorite go to receipes. It is excellent leftover AND the husband likes it! Sometimes, I will roast the tomatoes a day or two ahead of time and store them in the fridge before making the rest of the meal...still turns out great. I have added meat before (chicken) but honestly prefer it without. We try to go meatless at least one night a week over here so this is a perfect meal! 


Ingredients for Roasted Tomatoes:
2 pints (more if you like) Nature Valleys Cherub Tomatoes (or other kind of cherry tomato)
2-3 Olive Oil
1 TBSP Garlic powder
1 TBSP Onion powder
2 TBSP Romano cheese
1 TBSP Basil
1 TBSP Italian Seasoning
½ TSP each of Salt and Pepper.

Remaining Ingredients:
½ package of Whole Wheat spaghetti/ angel hair noodles
1 small sweet onion, chopped into thin strips.
1 TBSP minced garlic
½ bunch of Kale (can add more or less)
2 TBSP Romano Cheese
2TBSP Olive Oil
1 TBSP Basil

Cut the tomatoes in half lengthwise and place on a baking sheet. Coat the tomatoes in oil and spices. Mix well so they are covered in spices. Bake on 400° for a minimum of 40 minutes.

While the tomatoes are roasting, cook up some whole wheat pasta. I am notorious for cooking more pasta then needed. I would say about ½ package is ideal. When the pasta is done, just let it drain in the strainer, you want it to be relatively dry.

Next, add some spray Olive Oil to a large skillet. Chop up an onion and sauté with 1 tbsp. of minced garlic. When translucent, add the kale (be sure to toss the stems as this is thr "tough" part of Kale). I usually loosely chop the Kale before adding it in.

When the tomatoes are done roasting, add them to the same skillet with the kale and onions. Next add your pasta, handful by handful until you get to desire tomato/pasta ratio. Then add 2 tbsps. more Olive Oil, 1 TBSP Basil and freshly grated Romano. Mix thoroughly before serving. 

Sunday, July 1, 2012

Easy Pre- Vacation Dinner


This weekend went by so quickly! It consisted of the gym, laundry, giving the dogs a bath and finishing up some work stuff in preparation for my week off. Tim and I are leaving tomorrow for a 4- night cruise so I didn’t have all the typical “prepare for the week errands”. Meaning, I got to skip the grocery store! Not wanting to overindulge BEFORE the cruise, I wanted to whip up a simple yet healthy dinner at home. I turned to an oldie but a goodie, Vegetable Tortellini Soup. It is SO simple yet so delicious! Not to mention it is one of the husbands' favorites!


Ingredients:
      1   Large can crushed tomatoes or tomato sauce (I use whatever I have on hand)
5 cups stock ( I used my homemade)
2 tbsp olive oil
2 crushed garlic cloves
Green Veggies- 1 zucchini, chopped, a handful of kale, a handful of spinach ( I use whatever is in the veggie bin)
1 onion, chopped
2 carrots, chopped
1 tbsp basil
Salt and pepper to taste
1 package fresh whole wheat tortellini
1 tsp oregano
2 Bay leaves
1     1)  Heat the oil. Add all your veggies. Sautee until soft.
2    2)  Add the stock, basil, bay leaf, tomato base. Bring to a boil until blended. Add the tortellini. Bring back to a boil. Reduce heat and let it summer for 5-6 minutes or longer. Add the pepper and salt to taste.


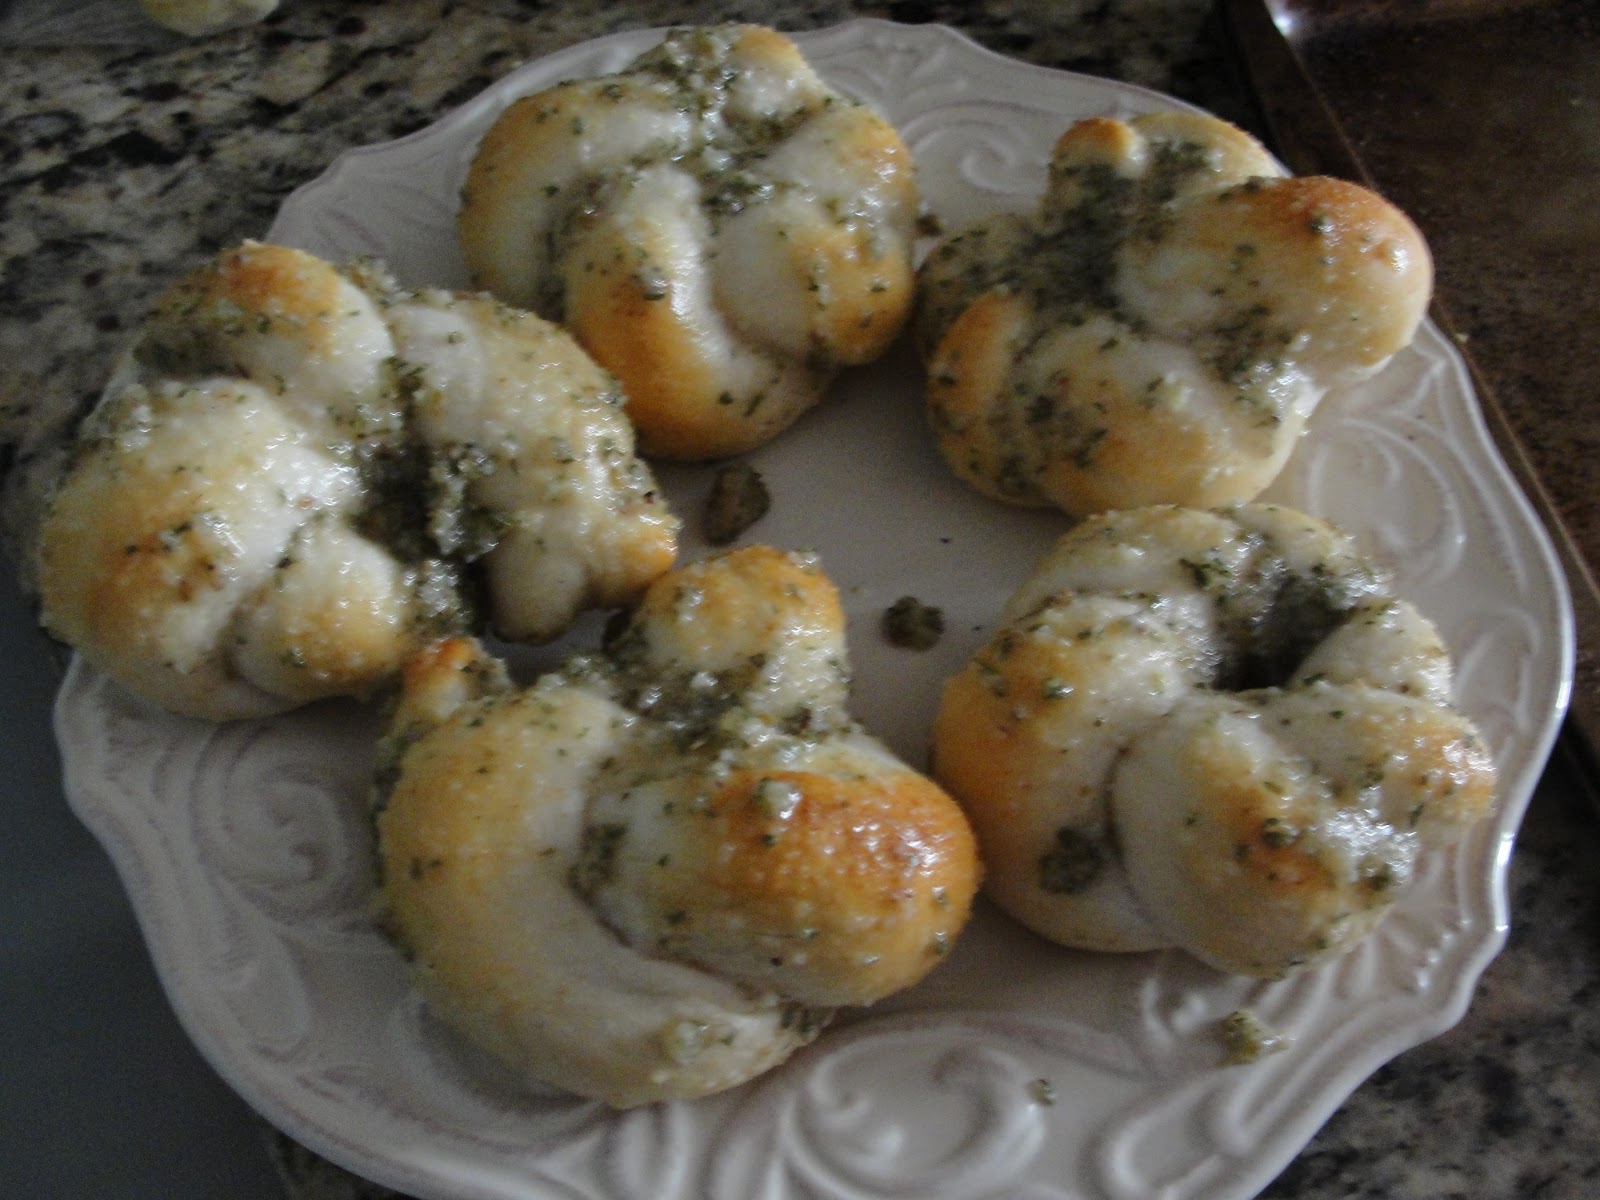
This soup is filling on its own but I decided to made a small batch of Garlic Knots on the side. For an experimental recipe, it turned out delicious! 

 I used a can of mini biscuits I had in the fridge ( A 4 pack is only $1.94 @ Walmart).


I rolled the biscuits out until 3-4 inches in length.

 Roped two of the biscuits together, forming into “knots” tucking the ends under. Repeat with the rest of the biscuits.

 Sprinkle with garlic powder and bake at 400 degrees for 8 minutes.

 In the mean time mix, 1/3 cup oil, 3 tbsp fresh grated Romano, 1 tsp each of garlic, oregano and parsley. 

When the knots are done, coat them in the mixture.


Believe me, they taste as good as they look! :) And I was so proud of myself for not taking the easy road and ordering out! 

I am off to finish packing. Here is our itinerary for the week! I am pretty excited, I have never been to the Keys! 

Wednesday, May 16, 2012

Mexican inspired soup

The other day I made this AMAZING soup. I know its summer here in Florida but I LOVE soup! And I have been on quite the kick latley... Plus leftovers make great lunches.
Tim was out, I had a nail appointment so Tuesday night I decided to just stop and get a quick rotisserie chicken for dinner. Something fast and easy, although I typically make homemade. The next night, we had BBQ chicken and corn on the cob cooked on the grill. I decided to use the leftovers of both of these meals to make soup and I am so glad I did.

Now I am relatively new to the whole make your own stock thing but I really like the idea of knowing exactly what is in the stock and that it is not overloaded with sodium.
So here is what I did. I took the chicken carcass with a good amount of meat still on it and put it in a large pot. I then added two empty corn ears from that night’s dinner, along with a whole onion, a whole carrot and some whole stalks of celery. I also added a bit of thyme and pepper for flavor. I filled the pot almost to the top with water and let it cook for an hour and a half. I then drained the broth from the goodies, saving only any remaining chicken and discarding the rest.

I let it sit in the fridge overnight and then skimmed any fat off the next day.  When I got home from work that night, I decided I wanted something with Mexican flavors. I used all of the broth and chicken and then added the following:

1 Can of corn, drained and rinsed
1 can of Black Beans drained and rinsed
1 can of Rotel with green chilies
1 onion, diced
1 TBSP dry ranch dressing mix
1 tbsp. Chili Powder
1/2 tsp. garlic powder
1/2 tsp. onion powder
Sprinkle of crushed red pepper flakes
¼ tsp. oregano
½ tsp. cumin
½ tsp. black pepper

Everything is already cooked, so you are really just boiling it to heat it and blend the flavors. I let mine simmer for 20 minutes. It made about 6 servings.
I recommend serving with a bit of shredded pepper jack cheese. YUM! 


Wednesday, April 18, 2012

Recipe FAIL!

I stayed home from work today because my allergies were really bothering me (like eyes swollen shut bothering me). I decided to make something easy for dinner and decided to make Buffalo Chicken Garbage Bread. There are recipes for this all over google but I followed this one I found on Pinterest.

Typically, I would make my own whole wheat dough but for convenience sake, tonight I opted for a pre-made pizza dough from the Publix bakery. I followed the recipe down to the letter, only I added some raw onions before rolling up the dough.
Raw bread, rolled up and ready for the oven.


The recipe said to cook on 425 for 20-25 mins. This is where the FAIL comes in. The bottom of my bread was BLACK after 20 minutes. I took it out to find the middle dough still raw. I tried cooking it longer but since the outside was fully cooked, things were cooking very un-proportionally!
We were able to eat it so it wasn't a completed waste (we just ate the outer layer). The flavor was good the cooking method just needs some adjustments! This would also be AWESOME to make with BBQ chicken and cheddar/colby combo!

Sunday, March 18, 2012

A fabulous, low-key St. Paddy's Day

Growing up we always celebrated St. Patrick's Day, primarily because it was also my maternal grandfather's birthday. He and my grandmother were both Irish and would always have the family over to celebrate the day. My grandfather died in 2000, but it is crazy to think that yesterday would have been his 90th birthday!

So ever since I can remember we always had a traditional Irish meal for St. Patrick's Day... Corned beef, cabbage and Irish soda bread. Wanting to carry on the tradition, last night I made my first corned beef. My mom always made the corned beef by boiling it in a pot for several hours and then adding in the potatoes and the cabbage. While I have enjoyed corned beef this way for years, I wanted to try something different.

After searching around Google for inspiration, I decided that I was going to bake my corned beef. Let's just say I will NEVER boil corned beef. It was delicious! First, I rinsed the corned beef  and placed it fat side up on a piece of foil big enough to wrap it in. Then I smeared Hot & Sweet Mustard all over the top of the meat and sprinkled a handful of brown sugar over that. I wrapped it all in the foil to keep the juices in and then stuck it in the oven on 350. My corned beef was around 2.5 pounds and I cooked it about an hour and forty minutes.
Tim and I both love roasted cabbage wedges and will often have that as a side dish. So I made the cabbage that way. (Cut into 8 edges, seasoned with garlic, lemon and olive oil, roast at 450).  And I cooked the potatoes in the corned beef seasoning that came with the meat.
We skipped the Irish Soda Bread this year, but a wonderful meal nonetheless.
Oh, And I have to share this picture of the Harrigan clan in their St. Paddy's day collars!
Seriously, how cute are they?

Sunday, February 5, 2012

Beet Greens...who knew?

Call me weird but I love beets. Always have. My mom and I use to eat pickled beets with salt as a side dish all the time. I love fresh beets as well but to be honest, don't make them that often. Especially since the husband is not a fan of beets. At all.

I recently came across a recipe for Beet chips. Lately, I have been craving the crunchy/salty combo so I thought this would be a good healthy alternative. So when I was at the produce stand, I picked up one bunch of fresh beets. The cashier asked " You aren't going to throw away these greens are you"? I of course had planned to do just that. She told me to cook it like I would spinach, that they are delicious. Since it was lunch time when I got back from my errands, I was more intrigued by the idea of cooking the greens then I was making beet chips.
Here is what I did:

1) Cut the beets from their stems. Beets got stored in a Ziploc bag and put back in the fridge.


2) Wash the greens and dry them in the salad spinner. I left mine on the wet side as I was planning on steaming them anyway.
3) Cut the leafy part away from the "red" stem. Dice the stems into small pieces. Throw in a plan with some chicken broth. Put the lid on and let them simmer (They stems take slightly longer to soften then the greens).


4) Once the stems have simmered for a few minutes, drain them in the strainer, return them to the pan with a touch of olive oil, a tbsp of crushed garlic and a sprinkle of red pepper flakes to taste ( We like a kick). Add the greens and the lid and simmer until wilted ( much like you would spinach).

This is the last picture I have, the battery died in the camera!
I am not going to lie, these were DELICIOUS! The husband agreed to take a bite and then said "These are freaking amazing". That night I had my grandma over for dinner and told her about my beet green cooking adventure. She stated her mother use to cook them all the time and she grew up eating them. So am I curious, I am the only one just finding out about beet greens?
End of code